Table of Contents
Introduction
Greetings, fellow inhabitants of this slightly mad planet! Did you know the average person flushes away a staggering 6 gallons of clean water with every trip to the bathroom? If the endless cycle of flushing perfectly good water down the drain to get rid of, well, perfectly good fertilizer strikes you as a cosmic absurdity, then buckle up. You’ve stumbled upon a guide unlike any other: how to build a composting toilet. Yes, you heard that right. We’re going to ditch the wasteful ways of conventional plumbing and embark on an eco-friendly adventure where your daily contributions become the building blocks of a gloriously fertile future.
Think of it, fellow Earthling, as a rebellion against the porcelain overlords! With a bit of woodworking, a dash of ecological know-how, and a healthy dose of humor (because let’s face it, this is all a bit strange), we’ll transform the mundane act of waste disposal into a testament to your eco-conscious brilliance. So, prepare to question everything you thought you knew about bathrooms and embrace the delightfully bizarre world of composting toilets!
Understanding the Composting Toilet
What is a Composting Toilet?
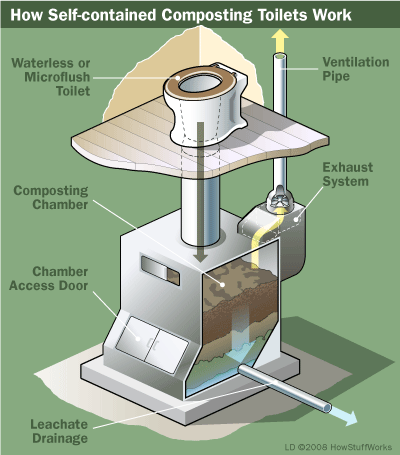
Imagine telling an alien visitor about this thing called a “toilet”. We use gallons of precious water to flush away something that could actually fertilize our gardens. Weird, right? A composting toilet flips this idea on its head. Instead of waste disappearing down a pipe, it collects in a container where microbes break it down into supercharged soil. It’s nature doing its thing, just in a controlled way.

The Benefits of Going Green
- Water Warrior: Every flush avoided saves a surprising amount of water. Want to know just how much? Check out this water footprint calculator.
- Dump the Sewage, Not the Nutrients: Flushing sends valuable nutrients down the drain, where they often go to waste (pun slightly intended). Composting returns them to where they belong – the earth!
- Garden of Galactic Goodness: Imagine the flowers! The veggies! Your garden will be the envy of the neighborhood, all thanks to the power of compost.
Local Laws and the Bureaucracy of Bathrooms
Sadly, not everyone sees the cosmic brilliance of composting toilets. Here’s the thing: laws about these systems vary wildly. To understand the rules in your area, you might need to do some research:
- Government websites often have info on sanitation regulations.
- Sustainable living forums are great for connecting with fellow composting enthusiasts and getting advice.
If your local laws are a bit behind the times, don’t despair! Become an advocate for change and help bring composting toilets into the 21st century.
Gather Your Toolkit
Building a composting toilet requires a cosmic collection of materials and tools. Don’t worry, these supplies are easier to find than a habitable exoplanet! Let’s break down the essentials and some potential upgrades:
The Essential Bits
- The Foundation: Plywood or Lumber: Your throne shall stand on this. For a sturdy and reliable composting toilet, aim for plywood at least ¾ inch thick or solid pine boards. This will give you the durability needed for a structure that can support human weight without warping. Dimensions will vary based on your design, but a good starting point is a box approximately 18 inches wide, 21 inches deep, and 18 inches high, providing enough space for standard buckets and comfortable seating.
- The Seat of Power: A Standard Toilet Seat: The key to comfort! Comfort meets function here. A regular, round, or elongated toilet seat will do just fine. Ensure it comes with a lid to keep things neat and to minimize odors. Installing the seat is straightforward – most come with easy-to-follow instructions and can be attached directly to the top panel of your box using screws provided in the kit.
- The Great Divider (Optional): A Urine Separator: For those opting to refine their setup, a urine separator can drastically reduce moisture and smell. You can find models online designed specifically for composting toilets, usually made of durable plastic or stainless steel for easy cleaning. This addition requires a bit of extra installation work, including creating an opening in your box and potentially additional plumbing for the liquid waste.
- The Waste Wranglers: Buckets: Sturdy 5-gallon buckets are the heroes here. For ease of use, find buckets with handles. You’ll need at least two: one for solids and another for liquids if you’re using a separator. Pro Tip: Reusing food-grade buckets from restaurants can be an eco-friendly and cost-effective option.
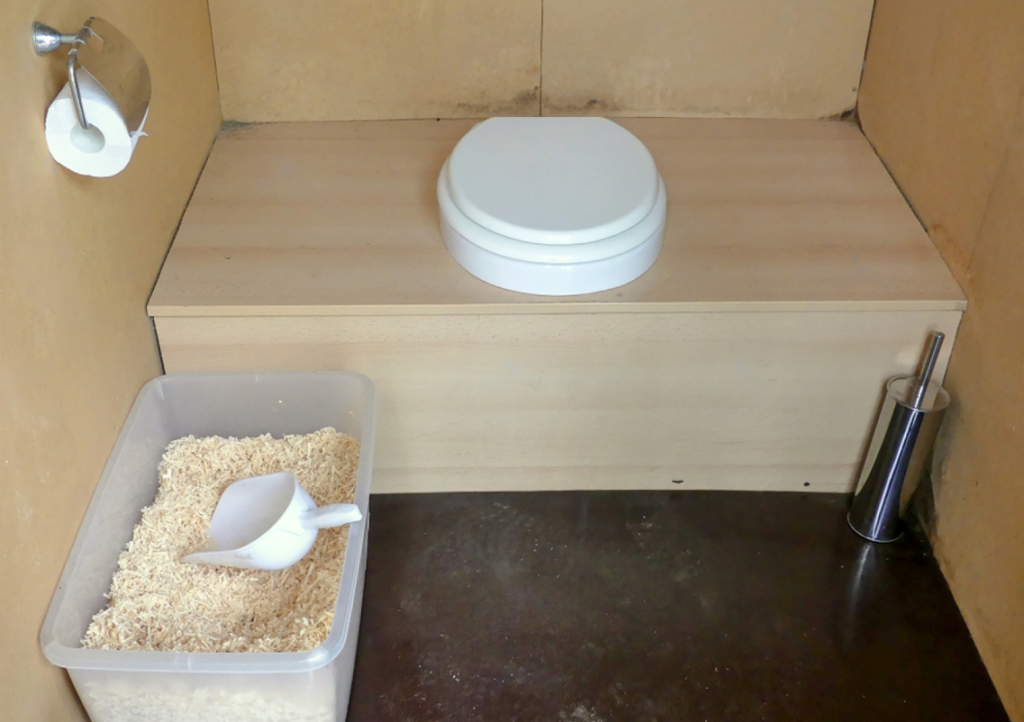
- The Magic Dust: Sawdust, Wood Shavings, or Coconut Coir: These are your odor and moisture controllers. Sawdust is readily available from local sawmills or woodworking shops, often for free. Coconut coir, a sustainable by-product of the coconut industry, offers excellent moisture absorption and is available in compressed bricks that expand when wet. A good guideline is to have a stockpile that will last several months, depending on your household size.
Tools for the Time-Traveling Toilet Builder
- The Wood Whisperer: Saw: Precision is key for cutting your wood. A circular saw offers quick, straight cuts, while a handsaw allows for more control and is budget-friendly. Whichever you choose, ensure your blades are sharp for clean cuts.
- The Unifier: Electric Drill: This versatile tool not only speeds up the assembly process but ensures your composting toilet can be disassembled for maintenance. A basic drill/driver is sufficient, with a variety of drill and screwdriver bits to match the screws you’ll be using.
- The Seat Shaper: Jigsaw: Perfect for cutting the opening for your toilet seat and any other intricate cuts. Look for a model with adjustable speed settings to handle different materials and thicknesses with ease.
- The Smoothers: Files and Sandpaper:
- No one likes splinters in delicate places. Start with a medium-grit sandpaper to remove rough edges, followed by a fine-grit for a smooth finish. Consider a sanding block or electric sander for larger areas.
- The Essential Fasteners: Screws and Wood Glue: Securing your structure means choosing the right screws (1½-inch wood screws are a solid choice) and wood glue (opt for a waterproof variety to withstand moisture). A tight bond ensures your throne can withstand the test of time.

Optional Upgrades for the Eccentric Eco-Warrior
- The Fresh Air Fanatic: Vent Fan: A ventilation fan is particularly helpful if your composting toilet will be in an enclosed space. To enhance your eco-warrior status, consider a solar-powered option. A vent fan is an important upgrade to consider when learning how to build a composting toilet, as it helps with odor control and improves the overall user experience.
- The Aesthetically Aware: Stylish Receptacles: While basic buckets get the job done, you can upgrade to containers that complement your bathroom decor and personalize your composting toilet setup.
- The Compost Connoisseur: Compost Thermometer: If you’re dedicated to optimizing your compost, a thermometer helps monitor the temperature inside your composting toilet and ensures those hardworking microbes are happy.
How to Build a Composting Toilet
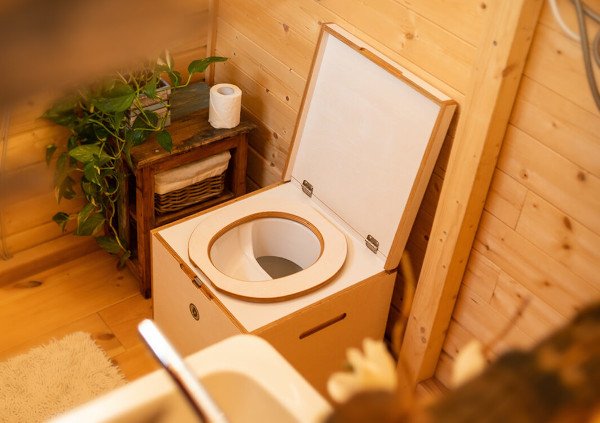
The journey from raw materials to a functional composting toilet begins with constructing the box – the heart of your environmentally conscious creation. Let’s break down the process with clear instructions and a focus on customization that will help you tailor your composting toilet to your needs.
The Toilet Box
Think of this box as not just a container, but a cornerstone of your commitment to greener living. Here’s how to create a sturdy base that respects both your comfort and the environment:
- Measure and Plan: First things first, let’s talk dimensions. For a comfortable sit-down experience, aim for a box height of about 18 inches from the ground, akin to your average chair. Your width and depth should be enough to house a standard 5-gallon bucket with some wiggle room – 20 inches by 20 inches is a good ballpark. Sketching this out will help visualize your eco-throne.
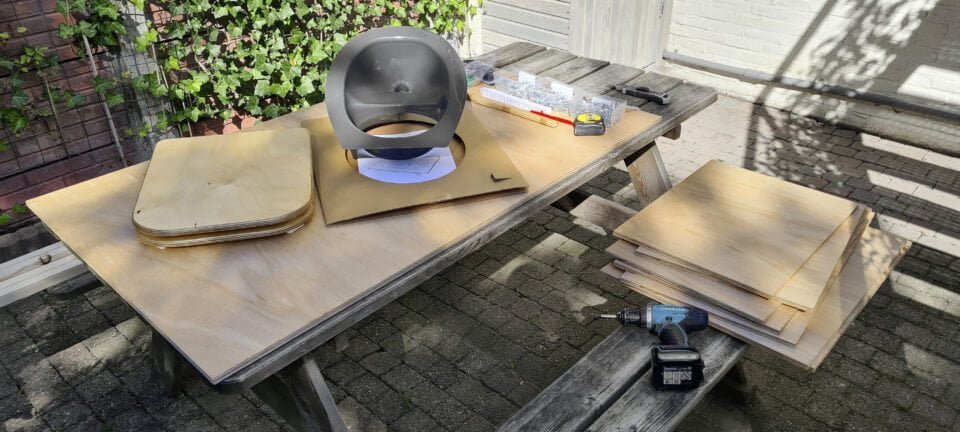
- Cut with Precision: With your measurements in hand, it’s time to transform that plywood or lumber into the sides, back, front, and top of your box. A circular saw will make quick work of this, but a handsaw and a bit of elbow grease can also get you there, ensuring every piece fits together like the pieces of an interstellar puzzle.
- Assemble: Bring your pieces together using screws (1½-inch wood screws are ideal) and wood glue for that extra bond. Start by attaching the sides to the bottom piece, then add the back and front. The result? A sturdy box that’s starting to look a lot like a composting toilet.
- Raise Your Seat: The height of your toilet is key to a comfortable experience. If your box isn’t tall enough after assembly, consider adding legs. Four sturdy pieces of 2×4, cut to your desired length, can be screwed into each corner of the bottom, elevating your toilet to the perfect throne height.
The Seat of Power
With just a bit of careful craftsmanship, let’s integrate a standard toilet seat for that familiar touch within this extraordinary system.
- Trace the Outline: Place your toilet seat on the top panel, ensuring it’s centered, and trace its shape onto the plywood.
- Create the Opening: Carefully use your jigsaw to cut out the traced shape, creating the opening for your toilet seat.
- Smooth the Edges: Sand any rough edges left from cutting to ensure a comfortable seat.
- Secure Your Throne: Attach the toilet seat to the top of your box using screws. Make sure it’s secure and stable.
To Divert or Not to Divert?
Here, we make a choice: to separate or not. A urine separator can be a fantastic addition, cutting down on odor and making your compost drier and easier to handle:
- Pros of Using a Urine Separator: It keeps things less smelly and more manageable, splitting liquid gold from solids for a harmonious composting experience. Plus, diluted urine can be a garden superfood!
- Cons: Added complexity and the need for a bit more TLC in your toilet’s maintenance routine.
Whether you choose the path of separation or a unified approach, your contributions are about to become part of something bigger. Your composting toilet is not just a fixture but a statement of sustainable living.
Finishing Touches: Because Even Compost Deserves Flair
Now’s your chance to add those personal touches that transform your composting toilet into a unique statement piece. From protective coatings to a hint of inspirational decor, let your eco-creativity shine through in the finished product.
- Protect Your Creation: Apply paint or a wood stain to protect your box from moisture and add a touch of personality to your composting toilet.
- Handles for Convenience: Consider adding handles to the sides of the box for easier handling and movement if needed.
- Inspirational Stencils (Optional): Add a quote like “Saving the World, One Flush at a Time” for an extra dash of eco-warrior spirit.
Unleashing the Power of Microbial Magic
Think of your composting toilet not just as a waste receptacle, but as a miniature, self-contained alien ecosystem! Within this humble box, a legion of microscopic beings hungrily awaits your contributions, ready to transform them into a gift more precious than gold – glorious, life-giving compost. Let’s delve into the slightly strange, somewhat smelly, but utterly fascinating inner workings of how to build a composting toilet.
How Your Composting Toilet Works (The Less Squeamish Explanation)
- The Microbe Mob: Your composting toilet isn’t full of dirt, but a teeming metropolis of bacteria, fungi, and other tiny decomposers. These are the true heroes, the ones doing the dirty work (pun absolutely intended).
- Feast of Waste: Every time you use your composting toilet, you’re essentially serving a buffet to these microbes. The carbon-rich materials you add (sawdust, wood chips, etc.) are like the bread and pasta of the compost world.
- Air They Breathe: Compost microbes, just like us, need oxygen. That’s why regular stirring or tumbling your pile is key to keeping this system happy and odor-free.
- The Gold at the End: Over time, as those microbes munch away, your waste transforms into rich, dark compost. This magical substance is bursting with nutrients, ready to make your garden the envy of the entire galaxy.

Mastering Composting
Transforming yourself into a compost overlord requires a bit of knowledge and a dash of patience:
- The Recipe for Success: Understand the golden ratio of “browns” (carbon-rich: sawdust, leaves) to “greens” (nitrogen-rich: food scraps, your deposits). Too much of either will throw your microbial civilization into chaos. Check out our guide “How to Layer a Compost Bin: A Step-by-Step Guide” where we dive into details on how to layer a compost bin and find the perfect ratio.
- Moisture Matters: Your compost pile should feel damp like a wrung-out sponge. Too dry, and things stall. Too wet, and it gets stinky.
- Stir Crazy (In a Good Way): Giving your compost a regular mix introduces air, preventing unpleasant odors and speeding things along. Some setups (fancy rotating bins) do this work for you!
- Patience, Young Padawan: Composting takes time. Don’t expect garden gold overnight, but trust in the power of those microbes to work their magic, however slowly it may seem.
Smells, Spills, and Other Mishaps
Even the most meticulous eco-warrior might encounter the occasional mishap. Fear not!
- The Nose Knows: A strong ammonia smell means too much nitrogen (did someone pee directly on the sawdust?). Balance things out with more carbon-rich materials.
- Soggy Sorrows: If it’s too wet, add more dry “browns” and aerate that pile!
- The Fruit Fly Invasion: These pesky critters love overly moist, food-heavy compost. Bury your food scraps deeper and cover well with sawdust to discourage them.
- Rotten Egg Smell Fix: Encountering a rotten egg smell? This is a sign your compost might be too wet and lacking oxygen. For a quick fix, check out our guide on “Fixing Rotten Egg Smell in Compost: A Quick Guide”. This will help you adjust your composting approach and eliminate those foul odors.
Conclusion
My friend, what a wild and wonderful ride this has been! You’ve built something extraordinary – a composting toilet, a testament to your ingenuity and your commitment to a greener way of life. Instead of flushing precious resources down the drain, you’re transforming them into something that nourishes the earth. This whole composting adventure may have come with a few unexpected smells and a sprinkle of sawdust in your hair, but hey, that’s part of the fun.
Think about it: you’ve learned how to build a composting toilet, a practical skill that connects you to the natural cycles of the world. You’re not just saving water; you’re returning nutrients to the soil, creating the potential for vibrant gardens and healthier food. By embracing this kind of DIY solution, you’ve proven that living more sustainably doesn’t have to be complicated or boring. In fact, it can be quite marvelous, even if it starts with something as unassuming (and slightly smelly) as a composting toilet.
