Table of Contents
Okay, fallen leaves aren’t exactly glamorous. But don’t be deceived! With a little know-how, they hold the key to the rich, crumbly compost your garden craves. We’re not talking about just chucking stuff in a bin. To unlock their potential, you need to master the art of compost layering. Think of it like making a delicious veggie lasagna – different ingredients create the perfect flavor and texture. In this guide, we’ll dive into how to layer a compost bin for maximum garden goodness. Get ready to transform your garden waste into gardening gold!
Understanding the science behind a thriving compost pile isn’t just about being a gardening whiz. It’s about doing your bit for the planet! We’ll show you how to collect, shred, and layer materials strategically, ensuring everything breaks down beautifully. Follow our steps
Understanding the Benefits of Compost Bin Layering
Let’s be honest, layering a compost bin takes a bit of effort. So, what’s in it for you? Turns out, a whole lot! By carefully layering your compost bin, you’re not just getting rid of waste. You’re creating a supercharged soil booster for your garden and doing your bit for a greener world.
Think of it like this: your compost bin isn’t just a bin, it’s your own mini-ecosystem, boosting soil health, helping plants thrive, and keeping stuff out of landfills. Did you know that food scraps make up over 24% of what we throw away? By composting, you’re seriously cutting down on that number!
The Role of Compost in Sustainable Gardening
Think of sustainable gardening as a superpower for your plants, and compost is the secret potion! By learning how to layer a compost bin, you’re creating an all-natural fertilizer factory right in your backyard. Those kitchen scraps and yard trimmings? They get transformed into a nutrient-rich feast for your soil.
Let’s be real, we’ve all had those sad-looking plants that just won’t thrive. But with compost in your corner, get ready for a transformation! Imagine lusher leaves, brighter blooms, and – yes – those supersized tomatoes. Ditch those harsh chemicals, and let the power of nature work its magic for a garden that’s bursting with life!
How Compost Improves Soil Health
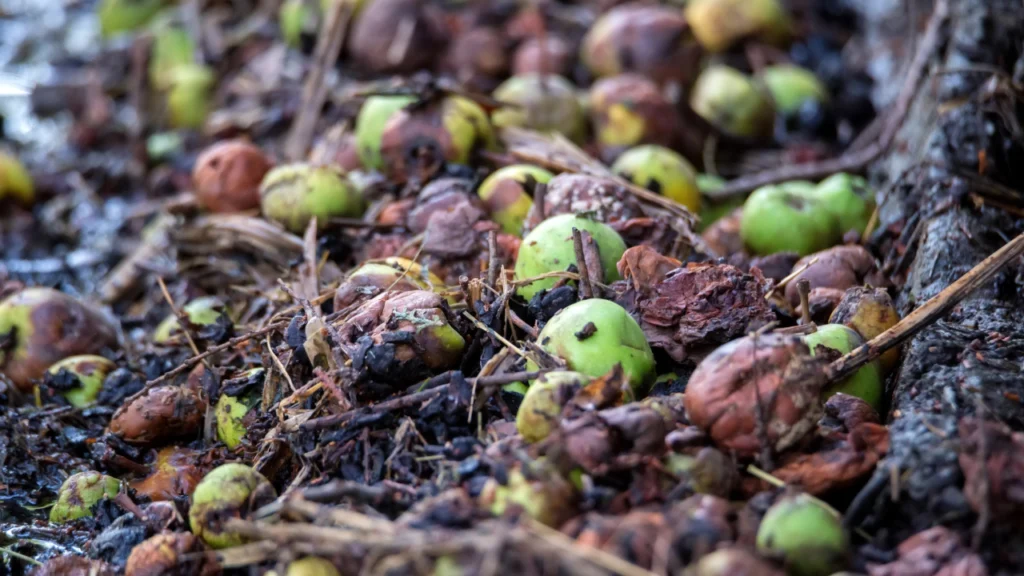
Picture this: dry, crumbly soil that barely supports your plants. Now imagine a rich, dark earth that practically bursts with life. Compost makes that happen! By layering your compost bin strategically, you’re feeding your soil the good stuff:
- Supercharged with Nutrients: Compost delivers nitrogen, phosphorus, and potassium – everything plants need to thrive.
- Moisture Magnet: Compost helps soil hold onto water, meaning less watering for you!
- Root Paradise: Compost helps roots spread out easily, leading to stronger, healthier plants.
Compost: Your Secret Weapon Against Landfills
Okay, maybe “secret weapon” is a bit cheesy, but seriously, composting makes a huge environmental difference! Think about all that stuff that could end up in a landfill. By learning how to layer a compost bin, you’re keeping it out of there, which means fewer nasty greenhouse gases. Plus, compost encourages those good-guy microbes that keep your soil healthy – it’s a win-win!
Here’s the breakdown:
- Landfill Lifesaver: Keeps food scraps and yard waste out of landfills, where they create harmful greenhouse gases.
- Microbe Magnet: Compost creates the perfect home for beneficial soil critters, crucial for a healthy ecosystem.
- Waste Warrior: Transforms everyday scraps into valuable fertilizer – talk about recycling goals!
Essentials of Compost Bin Construction
Imagine your compost bin as this enchanting little kingdom where your kitchen scraps aren’t just leftovers; they’re treasure, transforming into the kind of gold even pirates would envy – garden gold, that is! To get this magical process started, you need the right supplies! Here’s the breakdown of what to gather before you start learning how to layer a compost bin:
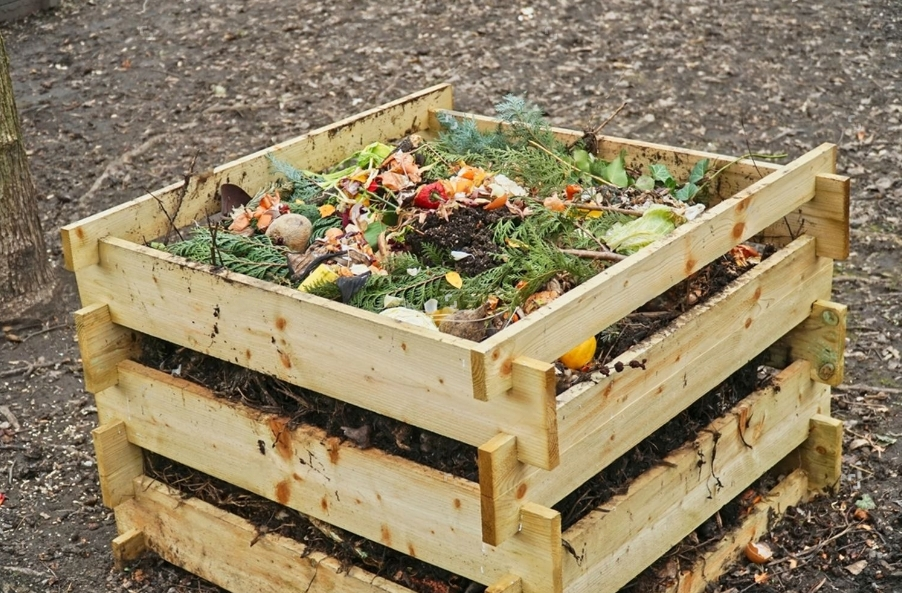
The Bin (or the Pile): First things first, you need a home for your composting adventure! You can buy a ready-made bin or get creative and build a simple pile in your yard. The key is making sure air can flow through to keep the composting process happy. Imagine a bunch of tiny creatures living in your compost bin – they need good ventilation to breathe and do their job of breaking things down.
The Ingredients: Compost needs a mix of two main things, like a delicious recipe!
- “Browns” (like leaves and twigs) are the energy source for your compost critters, kind of like the buns on a burger. They provide carbon, which gives these tiny decomposers the fuel they need to work their magic.
- “Greens” (like veggie scraps and grass clippings) are the green goodness, like the lettuce, tomato, and onion on your burger. They pack a nitrogen punch, which helps everything decompose faster and creates nutrient-rich fertilizer for your plants.
Extra Power-Ups: Want to give your compost a boost? Toss in kitchen scraps like fruit peels, coffee grounds, or even eggshells for an extra dose of nitrogen and other nutrients. Eggshells also add a bit of calcium, which helps strengthen cell walls in your plants.
Safety Gear: Let’s keep those hands safe! A good pair of gardening gloves will protect you while you build your compost masterpiece.
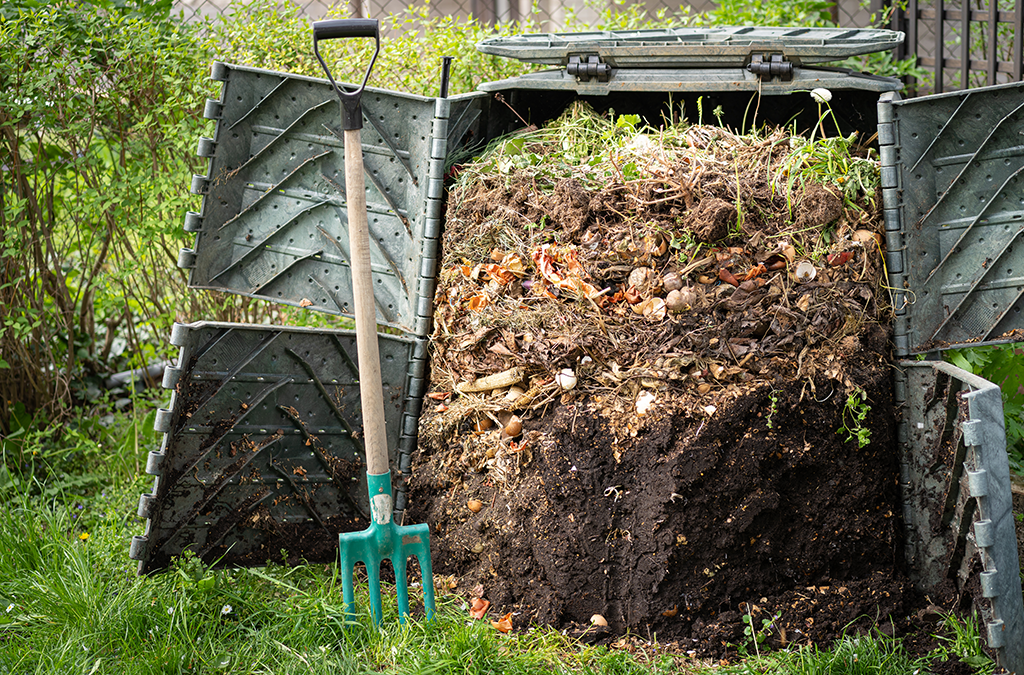
The Mixing Stick: A compost-turning tool (it’s like a giant fork!) is your secret weapon for mixing and fluffing your compost. This helps fresh air get inside the pile, just like turning your compost is like turning the pages of a book. The more you mix things up, the faster everything breaks down.
Gather these essentials, and you’re ready to start transforming kitchen scraps and yard waste into the best fertilizer your garden has ever seen! Remember, composting isn’t just about chucking stuff together. With the right tools and a little know-how, you’ll create a thriving, nutrient-rich environment that makes your garden sing!
Choosing the Right Materials for Your Bin
Just picture this: you’re about to whip up the ultimate mega-smoothie. But here’s the twist – your blender is actually your compost bin, and you’re blending up a storm of ingredients not for taste, but for the absolute pinnacle of garden glory. Here’s how to find the perfect “browns” and “greens” to learn how to layer a compost bin for maximum garden goodness:
“Browns”: The Backbone of Your Compost
“Browns” are the workhorses of your compost pile. They provide energy for the tiny critters that break everything down, kind of like a steady supply of fuel. Here are some easy-to-find “browns”:
- Dried Leaves: Mother Nature’s compost starter pack (and probably free!)
- Straw and Hay: Perfect for adding a bit of fluff to your pile.
- Wood Chips or Sawdust: Adds structure and helps with airflow.
- Cardboard and Paper: Just make sure to shred it up for faster breakdown.
- Branches and Twigs: Smaller is better to speed up the process
“Greens”: The Nutrient Powerhouse
“Greens” are the superfoods for your compost, packing a punch of nitrogen and other nutrients. They help speed up the composting process and make your finished compost extra rich for your garden. Toss in things like:
- Kitchen Scraps: Fruit and veggie peels, eggshells, you name it!
- Coffee Grounds and Tea Bags: Add a boost of caffeine for the compost critters.
- Grass Clippings: A great source of nitrogen, just use sparingly.
- Green Plant Material: Garden trimmings add valuable nutrients.
- Manure from Herbivores: This supercharges your compost. While we’re on the subject, you might be wondering, ‘Can You Compost Dog Poop? The Answer May Surprise You.’ It’s a common question with an interesting answer that could change how you think about compost ingredients.
Balancing the Compost C:N Ratio
Achieving the correct C:N ratio, which stands between 25:1 and 30:1, is crucial for the effective decomposition of organic materials without unpleasant odors or slow processing times. Understanding the varying C:N ratios of individual ingredients is key:
- Grass clippings typically have a C:N ratio of approximately 15:1.
- Vegetable scraps are usually around 25:1.
- Straw might come in at 75:1 or higher.
- Cardboard can have a C:N ratio of up to 350:1.
By mixing these materials in the right proportions, you can avoid a nitrogen surplus that might release ammonia or a carbon excess that slows down decomposition.
How to Layer a Compost Bin
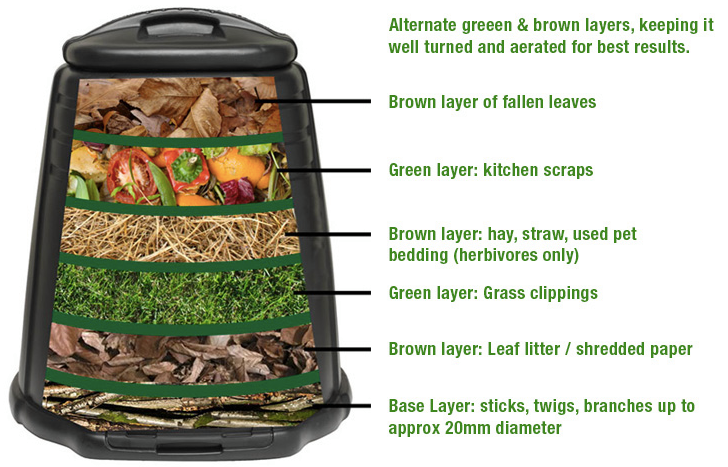
Let’s say your compost bin is the chef, and you’re in the kitchen of life cooking up an epic lasagna. Except, instead of mouthwatering cheese and sauce, you’re layering greens and browns that’ll bake into the most marvelous garden feast. Here’s the recipe for building the perfect compost pile:
Step 1: The Foundation
Start with a generous layer of shredded leaves. This “brown” base creates space for air to flow, which is essential for happy compost critters. Think of this as the noodles of your lasagna… it holds everything together!
Step 2: The Flavor Boost
Sprinkle in a thin layer of “greens” – kitchen scraps, coffee grounds, grass clippings. These nitrogen powerhouses kickstart the composting process and add essential nutrients. Think of them as the sauce that makes your lasagna extra delicious!
Step 3: Layer It Up
Keep alternating layers of “browns” and “greens.” This creates the perfect balance that helps everything break down beautifully. It’s like building the perfect lasagna – layers of flavor create the best result.
Step 4: Repeat and Reach for the Sky
Keep layering, making each new layer a bit thinner than the last, until your pile is about 3-5 feet tall. Aim for a mix of textures for the best airflow. Each new layer is like adding another layer of flavor to your compost lasagna.
The Moisture Check
Here’s where things get a bit different from actual lasagna! Your compost pile shouldn’t be soggy. Aim for the feel of a wrung-out sponge. Sprinkle with water if it’s too dry, or add more dry “browns” if it’s too wet.
With a little patience and occasional turning (like stirring the lasagna!), you’ll have rich, dark compost ready to supercharge your garden. Once you’ve created your compost, you might wonder about the best ways to store it until it’s needed. Don’t worry, we’ve got you covered with our guide on ‘How To Store Compost: Your Guide To Stashing Black Gold,’ ensuring your black gold is ready when your garden calls for it.
Maintaining Optimal Moisture in Your Compost Bin
Remember the story of Goldilocks? Turns out, compost is the same way – it needs moisture that’s “just right” for everything to break down perfectly. Here’s how to strike that balance in your compost bin:
Utilizing a Garden Hose with a Spray Nozzle
Your garden hose is your compost’s best friend! A spray nozzle gives you control for even watering. Think of it like watering your garden on a hot, sunny day. Here’s the key: you don’t want to drown your compost pile, but you also don’t want it parched. Ideally, you want all the nooks and crannies of your compost to get a gentle drink – just enough to keep the party going for those tiny decomposers. A good soak every now and then is fine, but avoid creating a swamp!
The Squeeze-Ball Test for Checking Moisture
Grab a handful of compost and squeeze! Here’s how to read the results, like deciphering a secret code for happy compost:
- Just Right: It holds together like a damp sponge. Imagine a well-wrung dishcloth – that’s the perfect moisture level for your compost. You should be able to form a loose ball without any water dripping out.
- Too Dry: It crumbles apart easily – time to add more water. If your compost looks like dust bunnies took over, it’s definitely thirsty. Give it a gentle sprinkle with your hose and repeat the Squeeze Test until you reach damp-sponge heaven.
- Too Wet: Water drips out – add more dry “browns.” Uh oh, your compost party might be a little too wet! Don’t worry, this is an easy fix. Add some extra “browns” like shredded leaves or cardboard (make sure to tear it up into smaller pieces). These dry materials will soak up the excess moisture and keep your compost pile aerated, which is super important for those decomposing critters.
Adjusting Moisture Levels for Peak Microbial Activity
Finding the perfect moisture might take some adjustments. If things feel too dry, gradually sprinkle water with your hose until you pass the Squeeze Test. If things get soggy, toss in some extra “browns” (like shredded leaves) and let some air do its work. You can also try turning your compost pile with a pitchfork or shovel – this helps aerate the material and allows for even moisture distribution.
The Golden Rule: Your compost should feel like a wrung-out sponge. Remember, it’s always better to err on the side of a little too dry than too wet. A soggy compost pile can become smelly and slow down the decomposition process.
With a little attention and practice, you’ll quickly learn how to layer a compost bin with ideal moisture conditions. Happy composting!
Maximizing Decomposition Through Aeration and Temperature Control
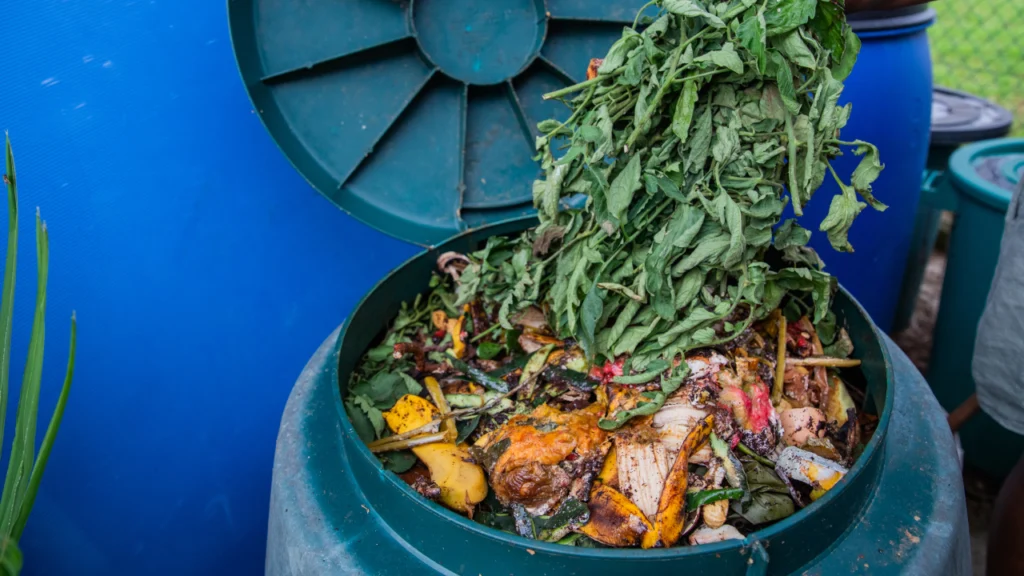
Think of your compost bin as the coolest, busiest little city around – Microbe Metropolis! Where every tiny inhabitant, from the fungi to the bacteria, is hustling hard, breaking down your scraps into compost so fabulous, it’ll have your plants gossiping over the fence. To keep these critters happy and productive, they need two key things: oxygen (to breathe) and a comfortable temperature. Here’s how to create the perfect environment for speedy decomposition:
The Importance of Oxygen in Composting
Oxygen is like fuel for the microscopic “workers” in your compost. Without it, things slow down, and you might even get some unpleasant smells. Here’s how to keep the air flowing:
- Turn, Turn, Turn: Regularly flipping your compost pile with a fork or shovel is like fluffing a pillow. It introduces fresh oxygen and helps everything break down faster.
- Keep It Loose: A dense compost pile is like a traffic jam for oxygen. Make sure there’s space for air to move through by adding bulky materials like twigs.
- Think “Fluffy”: Your compost shouldn’t feel heavy and compacted. Aim for a light, fluffy mix to encourage good airflow.
Temperature Regulation and Monitoring
Compost critters thrive in a warm environment. A well-working compost pile actually generates its own heat! Here’s how to monitor the temperature and keep things cozy:
- Your Secret Weapon: A compost thermometer is your best friend. Stick it in and see if your pile is reaching that sweet spot of 131-149°F (55-65°C).
- Spread the Warmth: If only parts of your pile are hot, it’s time to turn things over for even heat distribution.
- Tweaking the Recipe: If it’s not heating up, try adding more “greens”. If it’s getting too hot, add more “browns.” Balancing your “browns” and “greens” is crucial for managing temperature.
Why Bother With Temperature?
A hot compost pile does more than just smell better. High temperatures mean faster breakdown and help eliminate weed seeds and potential pathogens, giving you healthier, safer compost for your garden.
Conclusion
Think you know all there is about composting? Sure, you can make a pile of stuff, but learning how to layer a compost bin is like unlocking a secret gardening power! Picture yourself creating amazing soil that fuels incredible plant growth.
The trick is in the layers, just like a delicious sandwich. Browns, greens, a dash of water – layering your compost bin this way is the key to making awesome compost quickly, minus any nasty smells. Plus, you’re a total superhero for recycling scraps and yard waste!
With every layer, you’re crafting a cozy home for all sorts of critters. Worms, bugs, and invisible microbes turn those leftovers into garden gold. Mastering how to layer a compost bin means giving those critters the perfect place to do their magic.
Ready to become a composting legend? Healthy soil, happy plants, and a greener planet are all waiting for you!
